DIY Monday – Vintage Soy Candles

 Soy Candles are the greatest. Not only are they eco-friendly, but they can burn up to 15 hours and smell flippin’ fantastic.

What you’ll need:

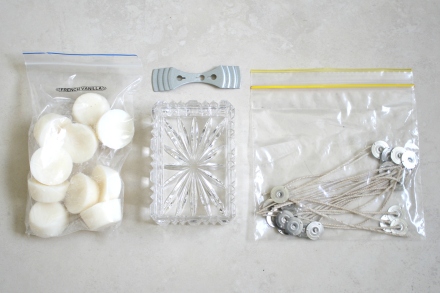
soy5

  • Container: I found the perfect base for my candles, antique crystal bowls. You could also use glass but I love the shine and weight of crystal.
  • Wax: I bought my wax on eBay, 10kgs foir $70. Seems expensive but That’s a great deal for those who don’t know about wax at all, and why would you? or even just melt down some old candles around the house.
  • Wicks: Again i bought mine on eBay and they come with the wick holders attached to the bottom which saves time cutting wicks and shoving them in the holders, i’m sure there are much better things i can do with my time.
  • Sticky dots: I used some adhesive dots from Kikki K i had lying around from last years forgotten scrap booking. You can use small squares of double sided sticky tape if need be.
  • 2 pots: 1 of them you won’t mind letting go if if this all goes wrong. Or one you dislike immensely.  Preferably one with a lip for pouring.
  • Wick holder: I like to think i’m a pro so i have an actual metal wick holder, but paddle pop sticks or chopsticks will do the job just fineeee.
  • You’ll also need your favourite scent in the form of an essential oil, You can grab these from almost anywhere.

I’ll be loosely basing todays  DIY on instructions from The Thousands.

First things first, make sure your container is clean and dry…

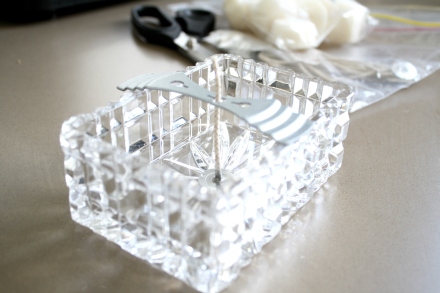
Secure your wick to the base of your holder and cut your wick (tip: Keep the piece you cut off as you could use it for some smaller candles in future)

soy7

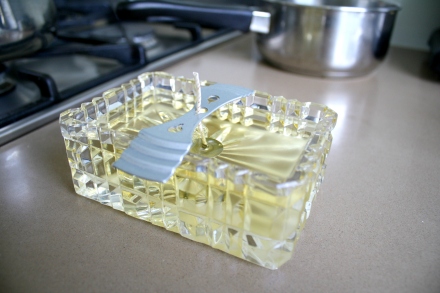
Once you have your wick in place and ready to go,  place soy wax in a pot and place pot inside larger pot of simmering water. Watch your wax happily melt away. Its hard to know exactly how much wax you’ll need so i always have a second glass ready to go in case i have extra wax. Alternatively you could pour it into a container and break it up to use at a later date.

soy6

Once wax is fully melted now is the time to add your fragrance to your liking. Give it a good slow stir. 

Quickly and calmly pour the melted wax into your waiting container being careful not to pour to quickly to prevent waves and knocking your wick over.

. Use the hot water from the underneath pot to rinse and wipe out the wax pot, or alternatively just leave the pot to dry and use as your candle making pot forever.

soy2

Pour yourself a cup cammomile and wait for your wax to harden.

soy1

I’m loving my finished product and gosh damn does it smell good!

IMG_5562

Next time on DIY Monday – Floral Bow Ties!

DIY Monday – Rubber Band Tie Dying

I’ve been wanting to tie dye something, anything for a long while now. So this is essentially my practice go. I’m going to start with the easiest and most traditional style; rubber banding.

What i’ve got is: A t-shirt, a packet of dye (which dye you get should depend on the fabric content of your garment, i’m dying polyester so i’m using a variant that works specifically for polyester and nylon), rubber bands, a large pot, a pair of rubber gloves and skewers.

iDye

Start by banding your top. Make your bands as tight as you can and think carefully about where you are putting them i.e.: dont put two right at the front of your top as you might garner some extra attention in the bust area. I used all thick bands as that was all i had around the house but ideally grab a bag of multi-sized bands to create different size circles. You can also use string for thinner, more defined circles.

banded up

Now, follow each instruction on your packet exactly. And beware! The liquid will stain anything it touches, so lay down newspaper, tarp, a parachute, anything, and don’t use your grandmothers antique wooden spoon yeah?

Boiling

Let it boil for 30mins -1hour, depending on your fabric to dye ratio. I packet of rit can colour up to 1.3kilos so im pretty safe with 1 top in a whole packet. Use tongs and gloves to remove the fabric, i poured my water out on the grass, and rinse thoroughly. I did this in the laundry sink. Carefully undo the rubber bands…

IMG_5250

…and hang to dry.

IMG_5270

Iron out and wear, sell or give as a gift.

Next time on DIY Monday – Soy Vintage Candles.

DIY Monday – Felt Fox Necklace

This weeks DIY inspiration comes from amazing fashion/DIY bloggers Lauren & Erica @ Honestly WTF.

As i am quite the novice at DIY and cannot be trusted with any leather related goods just yet,  i decided to try my hand at making a felt version of this necklace. Denim would also work.

sachinbabinecklace1

What you need is a sheet of felt (whatever colour tickles your fancy, i’m still caught up on fluro lime and grabbed this piece from Spotlight), a leather punch, some gold or silver chain and matching open hoops; i’m using 0.08mm sized, and jewellery pliers.

The team at Honestly WTF have graciously supplied their cutout for downloading, which you can access here to scale up or down as you wish. Or, simply choose your own stencil!

Step 1. Once you have sized, printed and cut out your stencil lay it on top of the felt and use a black texter to colour around the edges. This is a great way to accurately cut out your felt.

wpid-20130120_1754481

Step 2. With a texter, mark where you want your holes on each ear and along the bottom making sure they are evenly spaced. Use your leather rotary punch to make the holes, or if you are using felt you can use any sharp object such as a pin to make a big enough hole.

Step 3.  Cut your neck chain the length you like and your bottom hanging chains all the same length of your liking.  Use your pliers to open the exact amount of hoops and thread one through each of your pre-made holes. Slide the chain ends onto the hoops, using your pliers to close them securely as you go. For something different add beads along the chain or to the ends of the hanging chains for a more tribal look.

wpid-20130118_1800101

Step 4. Wear with pride and tell all about your creative prowess.

IMG_5396

Next time on Rainbow Luvrs DIY – Rubber Band Tie Dying